
BATCH CONTROL IDENTIFICATION (BCI) FOR CORE PRACTICE
Batch control identification (BCI) is essential in ensuring that we can tell which instruments were used on which patient, and which steriliser cycles they were processed in beforehand. This way, we have evidence that we are using sterilised instruments on patients, particularly instruments that are categorised as critical or semi critical. BCI and detailed steriliser logs are mandatory according to the Australian Standard 5639:2025.
Tracking systems include both electronic and manual tracking methods, both at point of sterilisation and at point of use within surgeries, where BCI forms part of the patient’s clinical record. These systems also allow for centralised logging and monitoring of both steam steriliser cycles and daily testing records for ultrasonic bath test cycles.
BCI links the record of sterility of a pack of critical instruments to a patient via their clinical record. It may be required as part of clinical records requests for legal and regulatory reasons and must be kept on a patient’s file for seven years or until the patient reaches 25 years of age (for minors). The information required includes the steam steriliser identification, the cycle number, and the date the cycle was processed. This entry in the patient’s record is traceable back to the steriliser logs, which include the steriliser identification, date, cycle number, pack integrity and successful chemical indicator change. BCI also forms an important tool in the recalling of instruments that have been subjected to an infection control breach, such as compromised steriliser load of instruments.
DETAILED STERILISER LOGS:
As specified by the Australian Standards AS 5369:2023, tracking and traceability of critical reusable
medical devices (RMDs) being sterilised within practices must include the following:
- Date of sterilisation and sterilisation process cycle number.
- Steriliser identification number or code.
- Identification of the RMD/other device (e.g. device name or name of a set of devices) and the number of these items within the load.
- Identification of the competent person accountable for loading the RMD/other device into the steriliser.
- Other records, including the following:
- Results of any performance tests required to determine functional performance of the equipment prior to use, e.g leak rate test, Bowie and Dick-type test.
- Results of chemical and biological monitoring undertaken for individual cycles or on a periodic basis.
- Sterilising agent (where applicable), batch number and expiry date.
- Documented evidence of attainment of process parameters, e.g. process record/printout where applicable.
- Identification of the competent person accountable for release of the RMD/other device (sterilisation load).
KEY ACTIVITIES
FOR STERILISER CYCLES:
- Upon completion of steriliser cycle, the unloading operator must:
- Check steriliser screen and confirm details.
- Unload steriliser, check that bags are dry and intact, and that chemical indicators have changed.
- Open cycle entry on Core Practice.
- Add instruments, if applicable.
- Click “Add Cycle Parameters”:

- Available templates window will open, and you will need to change the template – click on “Change Template”, then search for “Steri”. Four notes templates will be listed – STERILISATION CYCLE PARAMETERS, STERILISER BOWIE & DICK TYPE TEST, STERILISER VACUUM TEST and STERILISATION ULTRASONIC DAILY TEST (foil/pencil tests only):
")
- Choose the appropriate template for the cycle you have just run. Click “Use this Template →”
- Complete required information/answer questions in template, then click “Add Note”.
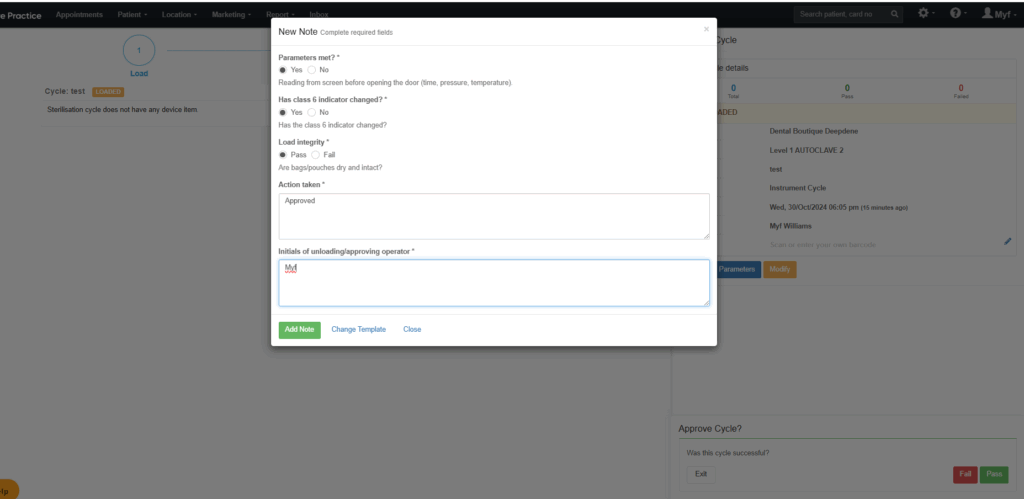
10. The templated information will then appear in the cycle details:
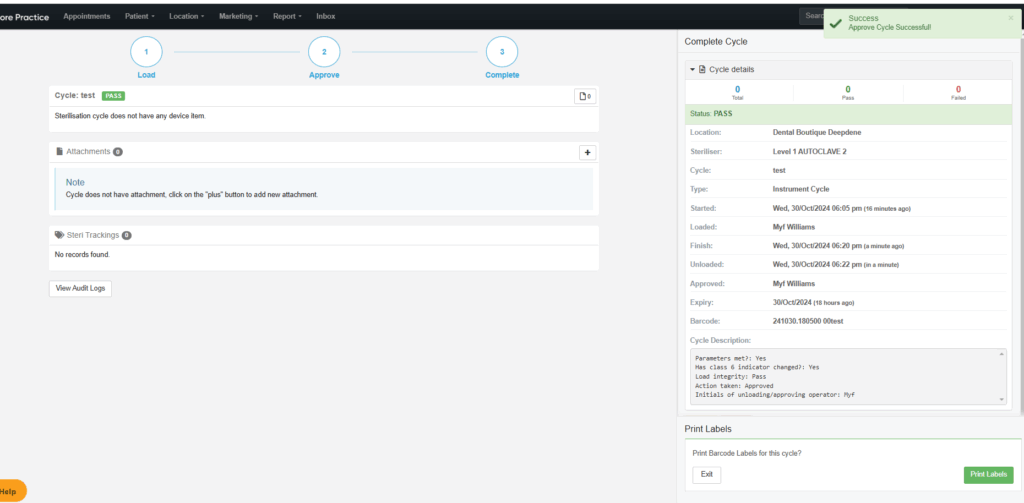
11. Complete cycle by selecting Fail or Pass on Core Practice.
")
- Generate barcode.
- Print barcode labels.
NOTE: If cycle has failed for any reason, eg. indicators unchanged, bags wet, mechanical failure of steriliser etc, please ensure that you select “fail” on the Core Practice log. This will ensure that the cycle number is recorded in the system appropriately. Cycle numbers must be consecutively numbered. All cycles must be recorded regardless of their pass/fail status. If the load has failed, ensure that remedial action is taken as appropriate, and reported to Clinical Team Lead.
FOR ULTRASONIC TESTS:
- Select “Create Cycle”.
- Click on “Steriliser” drop down menu.
- Select “Ultrasonic” from the menu.
- Click on “Type”.
- Select “Foil Test”.
- Insert cycle number.
- Click “Create Cycle”.
- Click “Continue Approve”.
- A prompt will appear to check that you are not adding instruments. Continue with approval.
- Select “Complete Load”.
- Click on “Add Cycle Parameters.
- Type “Sterilisation” or “Steri” into the search bar where it says Find template by name or group.
- Select Sterilisation Ultrasonic Daily Test “Use this Template”.
- Complete questions in template as appropriate.
- Click “Pass”.
- Click “Pass Cycle”.
ENTERING TRACKING INTO PATIENTS’ FILES
When entering instrument tracking into patients’ files, it is essential to follow standardised process as this
will enable swift recall of instruments for impacted patients in the event of an infection control breach.
To ensure that instrument tracking is entered correctly, please follow the below steps:
- Create new note in patient’s file.
- Click on “Settings” button
- Select “Sterilisation tracking”
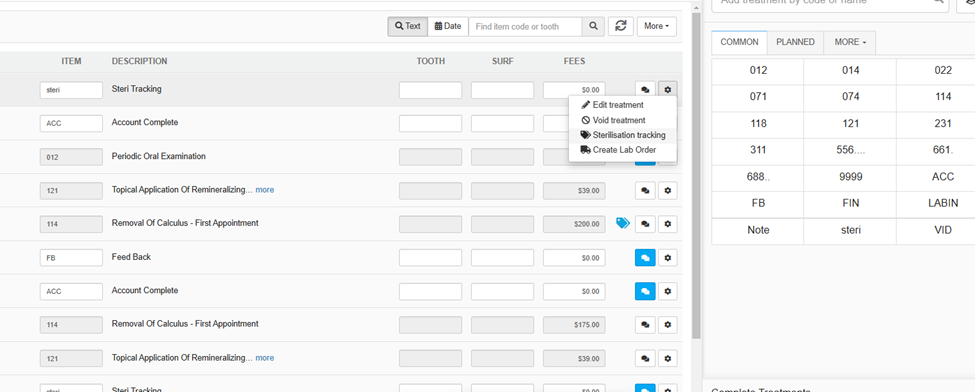
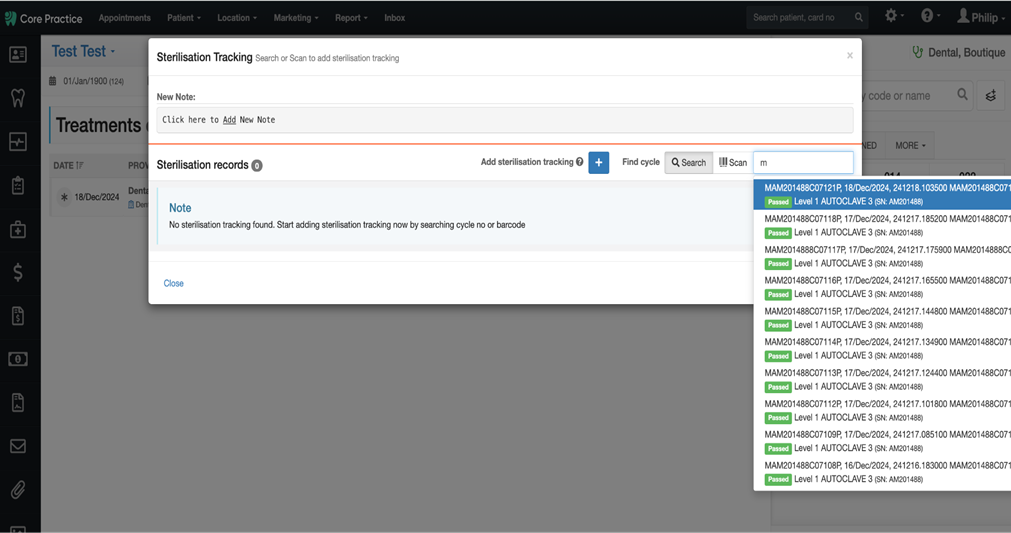
4. Click on “Add Sterilisation Tracking”
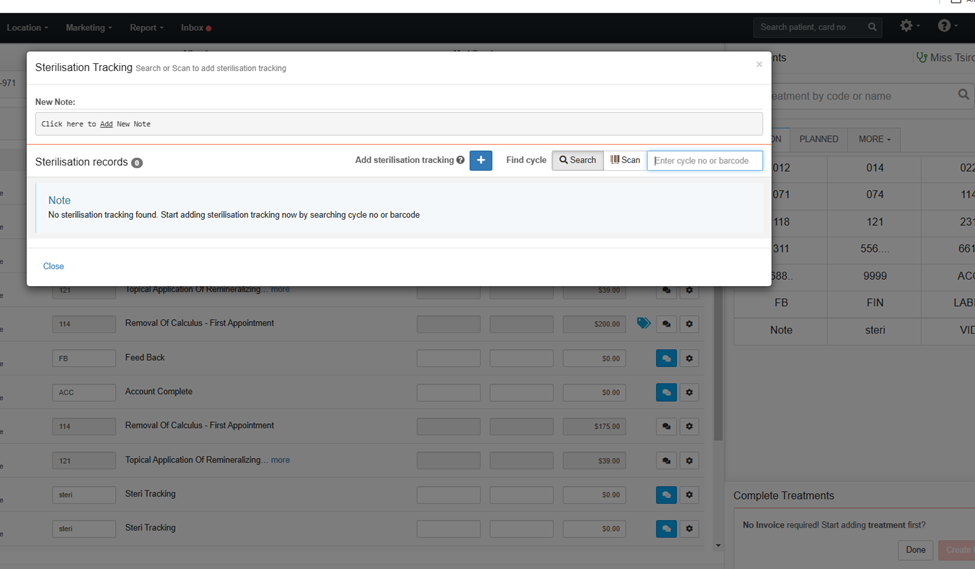
5. Add in tracking details by scanning (or start typing manually in the search box if necessary), then click “Add” and then “Close”
And lastly, here’s a video demonstration:
BACKING UP AUTOCLAVE CYCLE DATA VIA USB:
Most autoclaves come equipped with internal memory in order to record the details of each cycle over a period of time. As a form of backing up this data, we must copy it onto a USB or similar device and upload it to our practice’s drive. This is essential as we must keep this data for up to 25 years. If we do not save a copy of this data regularly, the memory in the autoclave is reduced to the point where it can no longer store new information, and an error code may appear on the autoclave’s screen. If this happens, please advise your clinical team lead.